
Pre-writing activities: how to help your child learn to trace and write
- Kindergarten readiness
If your child holds a crayon in a fist and pushes a page of dotted letters away, start a step before letters. These pre-writing activities come first: Play-Doh to build hand strength, short crayons to practice the grip, then tracing lines and shapes before letters and words.
Writing a letter asks a lot of a small hand: strong fingers, a steady hold on the crayon, and control of the lines and curves that letters are made from. Those are pre-writing skills, and pre-writing activities build them through play before letters come in. If you're working out how to teach handwriting at home, the steps below come in order, with activities for each one and the signs that it's time to ask an occupational therapist.
We teach this one-on-one in homes across Dallas: see kindergarten readiness tutoring.
What pre-writing skills are and why they come before letters
Pre-writing skills are the hand skills and basic strokes a child needs before writing letters. They include strength in the small muscles of the hands and fingers, a steady hold on a crayon or pencil, and the control to start and stop a line where your child wants it. They also include the pre-writing strokes: a line down, a line across, a circle, a cross, and slanted lines.
Every letter is built from those strokes. A lowercase t is a line down and a short line across. An o is a circle, and an x is two slanted lines that cross in the middle. Straight lines usually come before circles, and slanted lines often come later still, which is one reason letters like k, v, and x can take longer to come out right.
Of course, it makes sense to want to go straight to letters, since letters are what school asks for. But a child who is still learning to close a circle has two jobs on a letter worksheet: steering the crayon and remembering the letter. When the pre-writing strokes come easily, more of their attention can go to the letter.
Fine motor activities for preschoolers that build hand strength
Steady strokes depend on a strong hand, and that strength comes from fine motor skills: the small movements of the hands and fingers, like pinching, squeezing, twisting, and turning. Practice with those movements makes it easier to hold a pencil steady through a whole letter. A few pre-writing activities to try at home:
- Play-Doh. Roll it into snakes, squeeze it, pinch off small pieces, and poke holes in it with one finger. Pinching works the same fingertips that will later hold a pencil.
- Tearing paper. Tear scrap paper into small pieces and glue them onto a drawing. Tearing uses both hands at once, one holding and one pulling.
- Picking up small things. Move pom-poms, beads, or cereal from one bowl to another with the fingers, then with a clothespin or kids' tongs. Squeezing the clothespin builds pinch strength.
- Stickers. Peeling a sticker off and pressing it onto a dot you've drawn takes fingertip control and aim.
- Drawing on a wall or an easel. Tape paper to the wall at your child's eye level and let them draw big lines and circles. An upright surface puts the wrist in a good position for writing and works the arm and shoulder too.
Keep each activity short and stop while your child still wants to keep going, so they're glad to come back to it the next day.
How to hold a pencil: pencil grip for young children
As those small muscles get stronger, the way your child holds a crayon usually changes too. Many young children start out holding a crayon in a fist, with the whole arm doing the moving. Over time the hold moves into the fingers, and the movement shifts from the arm to the wrist, then to the fingers. The grip children are usually taught is the tripod grip: the pencil is pinched between the thumb and pointer finger and rests against the middle finger, with the other two fingers curled toward the palm.
You can help your child's pencil grip along at home without correcting it all day. Break crayons in half: a short crayon leaves room for only the thumb and two fingers, which nudges the hand toward a tripod grip. Show the grip once at the start of drawing time, then let your child draw, because moving a child's fingers over and over can turn drawing into something they'd rather avoid. And keep the fine motor play going, since a grip usually settles as the hand gets stronger.
Tracing lines and shapes before tracing letters
Once your child can hold a crayon steady, tracing gives the hand a path to follow, so it can practice a movement before it has to make that movement on its own. Take it in small steps, a few minutes at a time.
- Trace with a finger first. Draw a big line, circle, or zigzag and have your child run a finger along it. A tray of salt or sand works too, since the finger leaves a mark.
- Trace lines and shapes with a crayon. Start with the pre-writing strokes, drawn thick enough that there's room to stay on the line. Make the lines thinner as your child gets steadier.
- Move on to tracing letters. We start with lowercase letters, since they make up most of what your child will read and write. Letters made of straight lines, like l and t, are a good start, then curves like c and o. Mark the starting point with a dot and the direction with an arrow, so your child makes the letter the same way each time.
- Copy beside a model. Write a letter and have your child write it again next to yours, with no line to follow.
- Write it from memory. Say the letter, and let your child write it on a blank page.
Picture a 5-year-old who can trace a whole row of the letter b neatly but can't make one on a blank page. Tracing has taught her hand to follow a line, but she hasn't yet had to start one herself. Copying a b next to a model is the step that connects the two.
Play-Doh fits in here too: bend a rolled snake into a letter and have your child trace it with a finger, so they feel the shape before it goes on paper.
Letter formation, then first words and sentences
The dot and arrow in step 3 are there for letter formation: the way each letter is made, including where the pencil starts, which way it moves, and the order of the strokes. Most letters start at the top. When a child makes a letter the same way every time, the movement gets easier with practice, and more of their attention is free for spelling and for what they want to say.
Once a handful of letters come easily, put them together into words. The letters in your child's name are often the first ones they want to write, and writing their first name is one of the early skills we work on. Short words they can already read, like "cat" and "sun," make good next words. After words come short sentences, copied first and then written on their own. Later, the same skills carry into writing answers about what they read.
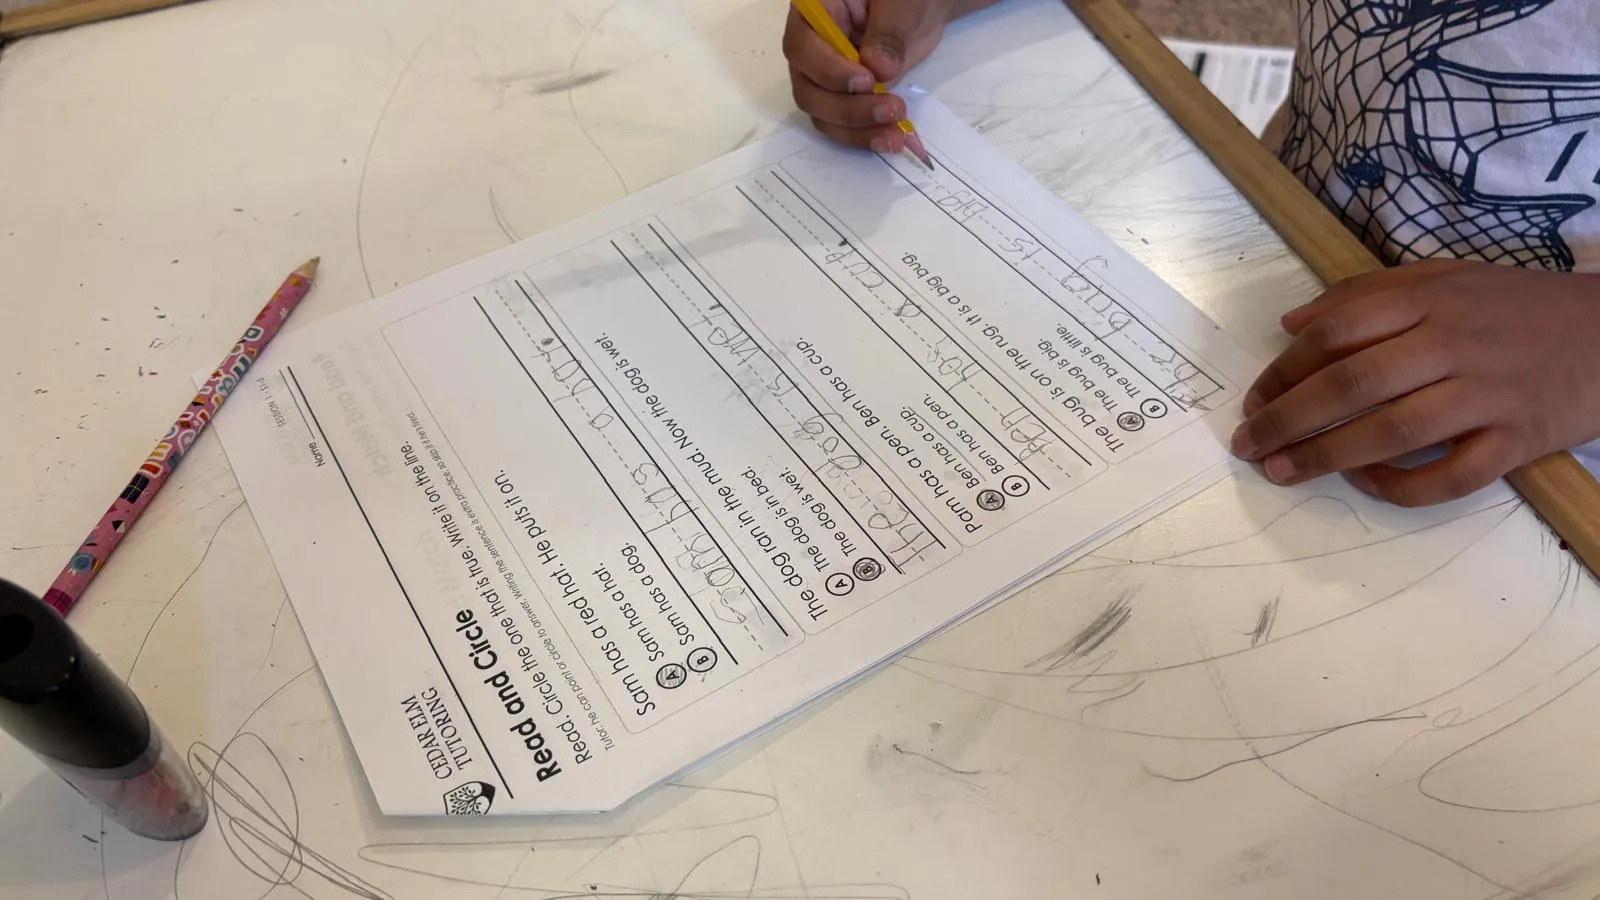
Copying sentences is where early writing meets reading. One of our reading worksheets, called Read and Circle, asks a child to read 2 short sentences, circle the one that is true, and write it on the line. Under the title, in small print, is a note to the tutor written for one boy: "He can point or circle to answer. Writing the sentence is extra practice, so skip it if he's tired." The sheet's main job is reading, so on a long day the writing can wait. For young children, learning to read letters and learning to write them often go together, and our reading tutoring starts at the same place, with letters and sounds.
When to ask an occupational therapist about grip or handwriting
For some children, the hand work stays hard even with steady practice at home. An occupational therapist, or OT, helps children with the hand skills behind everyday tasks, including holding a pencil and writing. An OT evaluation may be worth asking about if you keep noticing signs like these:
- Your child says their hand hurts, or shakes it out, after a short time drawing or writing
- They press so hard that crayons break or paper tears, or so lightly that the marks are hard to see
- They avoid drawing, coloring, and other play that uses their hands
- Other small hand tasks are hard too, like buttons, zippers, or opening a snack bag
- Their grip stays tight or awkward after plenty of practice, and writing tires them quickly
Your child's pediatrician can tell you how to arrange an OT evaluation.
Cedar Elm is a tutoring service: we don't diagnose, and we don't provide OT. If your tutor notices signs that an evaluation could help, we'll tell you. If your child already sees an OT, tutoring works alongside it, and it helps to tell your tutor what the OT is working on.
How we teach tracing and writing in Dallas homes
We teach young children to trace and write using methods that work for them. Your tutor gives your child different options and keeps trying different things, and when one way is making sense, sticks with it. In sessions, your child might shape letters from Play-Doh, write them in a tray of sand or salt, trace sheets made just for them, hold a short crayon for grip, or write on paper taped to a wall or an easel. Most children start with their own name, in lowercase letters. Your tutor brings the worksheets, Play-Doh, and pencils, so there's nothing to buy.
We tutor children from Pre-K up, and younger children getting ready for Pre-K, in their homes in Dallas and nearby cities. Early writing is part of our reading sessions and our kindergarten readiness tutoring, along with counting, letters and sounds, and learning readiness, like sitting at a table and following directions.
Teaching writing to kids with ADHD and autism
Tutoring kids with ADHD, autism, an IEP, or a 504 plan is our specialty. The hands-on options above, like Play-Doh letters and the sand tray, give your tutor more than one way to practice the same letter, and your tutor watches for the ones your child is motivated by. In the first few sessions, your tutor also adjusts the pacing while learning what works for your child.
For young children, an hour is usually 8 to 10 short blocks of 5 to 10 minutes, each a different activity, with at least 2 breaks. Harder work comes first, while your child is fresh, and the session ends on an easy review. When your child hits their limit, your tutor asks for one more very short task, under 2 minutes, praises them for finishing it, and gives a short break.
Many families come to us as their child finishes ABA and is ready for more schoolwork, and tracing, holding a pencil, and forming letters are among the skills we usually start with. Before I founded Cedar Elm, I spent a year as a Registered Behavior Technician (RBT) working one-on-one with autistic children at an ABA clinic, and 3 years tutoring at a tutoring center. The short blocks, planned breaks, and praise in our sessions are ABA-informed strategies I learned at the clinic. We use them to teach schoolwork, and we don't provide ABA therapy. You can read more about how we tutor kids with ADHD and autism.
If the page of dotted letters is still getting pushed away, go back a step to the Play-Doh and the crayons, and bring the letters back once lines and circles come easily. At the free consultation, your tutor spends time with your child on a short, easy activity and sees where they are with writing and handwriting.
